My husband’s extended family is in baby making mode. I started making baby blankets for all the new babies in this latest crop. This is my 5th one in 4 years. I’m sure it won’t be the last. They are all unique.
This one is a pattern from Stephen West, Painting Honeycombs Blanket. I’m making the smaller version. I’m using smaller needles because the fabric is better using size 6US/4mm and this yarn. To compensate I cast on 10 more stitches (1 honeycomb) to keep it the same size.
I’m using Scheepjes Softfun yarn, which is 60% cotton and 40% acrylic. I bought the Jewel color pack, which is made up of 12 different colors in 20g balls. I added a yellow and orange to round out a rainbow. The background color is called ”Mist” which is just a hint of greyish white.
So far I’m zooming along knitting this. It’s easy tv knitting. I’ve knit a section with each color and it looks like I’ll have enough of the small balls to make 3 repeats of the colors. Yay! It will be a nice size then. My goal is to get it finished before the end of April. As you can tell from the fewer posts and less craft content, working has really cut into my fun time. 🙂
Oh yeah, I always like to post the back side of projects because, as a maker, the back side is always as interesting as the front.
I realized when I went to Ravelry to update this project that I had started it in DECEMBER. I thought I had started in January. No wonder it seems like a long work in progress. But now it’s done!
The pattern is “Sandstone Peak” by Irina Anikeeva. I knit it Cascade 220 Worsted Heathers, in color Galaxy. I knit is per the pattern EXCEPT, and this is a big exception, I knit it in pieces and seamed them together. This required a lot of notes and calculations to keep the sleeve/body decreases correct, but it all worked out.
I used 9 buttons. I hate a sweater that gapes open. When it came time to make the buttonholes I first made a test one by knitting the first row as written in the pattern, then knitting a few more stitches, turning the work and working back over the buttonhole, and turning to work over it again, just to see what it would look like and how it would fit with my buttons. I’m glad I did because the buttonholes were way too small and not very neat. I couldn’t remember how I made good ones in the past so I pulled out my trusty Vogue Knitting bible and looked up buttonholes. They explain how to knit 4 different kinds. I chose the 1 row buttonholes which I made over 4 stitches. They are perfect! Really happy with the results
I’m really happy with everything about this sweater – the fit, the cables, the buttons, even the high collar… EXCEPT – this yarn attracts my cats’ white hair like a MAGNET. I’m constantly picking which hairs off of it. I think I will wear it outside the house most of the time.
I really enjoyed knitting this sweater and highly recommend the pattern. Sorry it took me so long to finish it and write up a post about it. Next week will be a WIP post about my ONLY remaining project in process. Working and accordion playing has taken up a lot of my time and I don’t have as much left over for crafts. I’m feeling ok about that. My job is going well, I’m loving the accordion, and the weather is warming up so I’m also doing things in the garden. I’m cultivating a well rounded life. 😀
This week the cats are a stand in for me. I have been sick with a cold for a week. I felt like Jake here, like a real Ragdoll, not good for anything but hanging out on the couch. This will not be a post about knitting or spinning or any other crafts. Not much to tell. I’ve knit on my cabled cardigan, but that will be for next week.
And here’s Frank (Asinsinatra) hanging out on the stairs. I’m always afraid he’ll fall asleep and fall between the steps, but hey, survival of the fittest we say in our house.
The week started out so good. On Friday we walked from our house to Huis Duinen, along the dike, along the Waddezee, with a stop for hot chocolate above the beach.
This past week has been the sunniest week in March EVER, and instead of going out and enjoying it, I spent it inside, coughing, sneezing and feeling sorry for myself. Over the week I did 4 home COVID tests and 1 official PCR test at the GGD. All negative. I kept testing because I kept feeling worse and then couldn’t smell cat poop. Today, a week after that photo was taken, I think I’m getting back to normal. Cat poop and all.
So, sorry about the lack of a craft post and I hope to be back next week with a FINISHED OBJECT! Won’t that be exciting. And the start of a new project (or 2). I hope you are enjoying some hints of Spring. The latest news in the world is terrible and scary. The natural world is a good place to look for peace. A walk in the woods, or a city park, can do wonders for my spirits. You too?
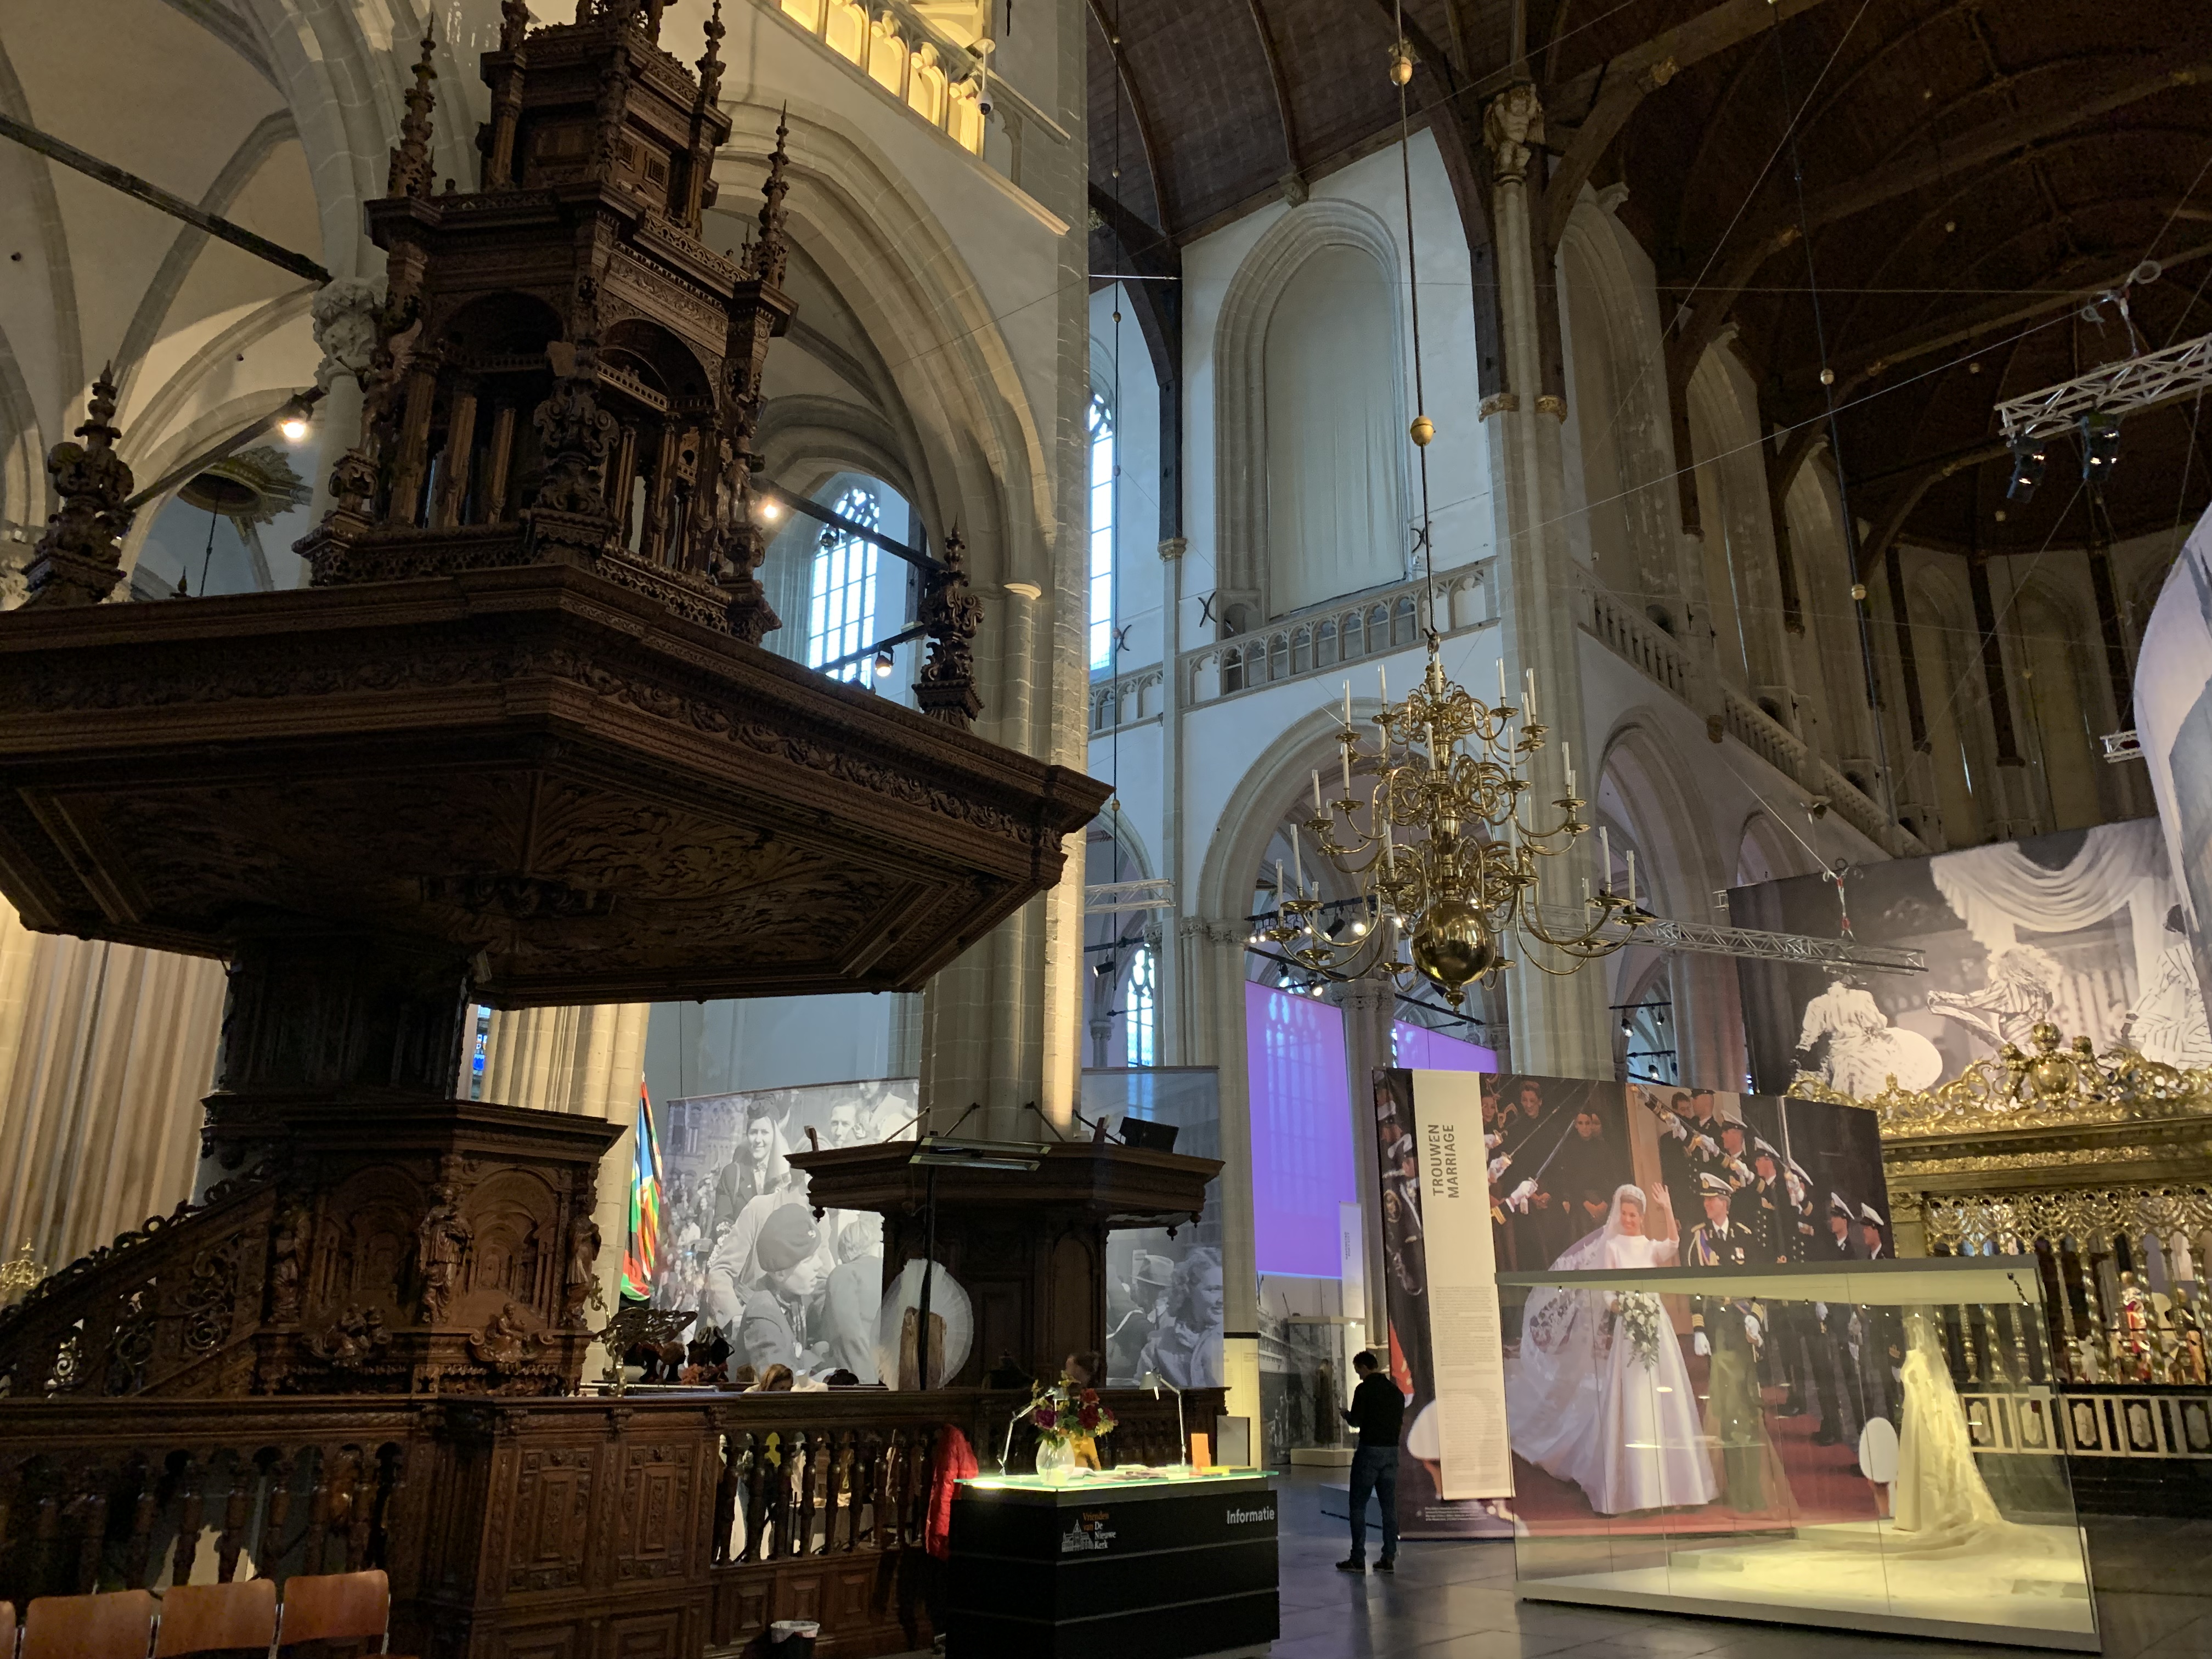
Last Friday 2 friends and I went to the Nieuwe Kerk (New Church) to see an exhibition of fashion by Dutch fashion designers. You can read more about it, and see better photos than mine, here.
The exhibition showed clothing from the 17th century up to the present time. It was really interesting and inspiring. I’ll put my best photos at the end of this post.
There was one exhibit that gave me ideas about what to do with the many pairs of jeans with holes in them that I’ve been saving.
The designer cut up old jeans, created a patchwork fabric, then sewed new jeans out of that fabric. I love this idea! This is what I will do with my old jeans collection and sew the fabric into a jumper or sleeveless A-line dress. I just hope that my sewing machine is up to all that heavy fabric. These pieces have been top stitched with the gold thread used on Levi’s jeans which I really like. Time to get a heavy duty sewing needle! I also really like the added stitching on some of the squares. I don’t think I’ll add the paint/bleach though. 😉
Here’s another view with the ”Amsterdammertje” under his butt.
If you’re local, or planning a visit between now and 3 April 22, I highly recommend you go see this exhibit. AND you get to see a church which was first built in 1409. It’s pretty impressive in its own right.
More photos from the exihibit…..
Looks like my school art projectDress detailHeavy metalCreated for the National BalletBikes haven’t changed much over the yearsFrom a Japanese internment camp during WWIII would wear this Queen Maxima’s wedding dressExperimental knitting
And now a few photos of the church. The lighting is very dim, but you get the idea.
There is information in English about the church on their website. Since 1979 it has been a place for exhibitions, official State events, concerts, etc. It sits right on Dam Square so if you are visiting it’s hard to miss! Well worth a visit no matter what is taking place at the time.
I finished this skein of yarn during the Closing Ceremonies. (And, IMHO, the most boring Olympic ceremony EVER. Good thing I was multitasking.) But, was it really ”finished”?
As I said in my last post, nothing is constant except change, and even after I wrote that post I changed my mind about this spinning project. It was last Friday and I still had to finish the 3rd bobbin and also the 4th bobbin, 50g, of very thin singles to spin, and then ply. I wasn’t going to make it by Sunday. I had a brain wave! I love 3 ply yarn. So, why not 3-ply those first 3 bobbins and be done! Then later I can spin 3 ply yarn again with a different set of 3 colors, and again with yet a DIFFERENT 3 colors. I’ll end up with 3 slightly different colored skeins of about 125g each, which will be enough for a light weight sweater. And that is what I did. (Skein 1 using colors 1,2,3; then skein 2 using colors 2,3,4; then skein 3 using colors 1,3,4)
Back to the ”finished” question. Here is a photo of the skein of yarn on Sunday, just after plying it and skeining it up.
Unwashed
And here is a photo, taken in similar light, in the same spot, after washing and drying.
After washing and drying
Here is a close up side by side, unwashed left, washed right.
Can you see the difference? When I finished plying it I was kind of disappointed. It was not very soft and not at all fluffy. It didn’t look overspun at all so I guessed it was just the type of wool and prep (commercially dyed and prepared Corriedale top, fiber from New Zealand, 25-30 microns). BUT, after I soaked it in very hot water and some wool wash, let it hang dry, it’s much softer and is even a little fluffy. NOW I consider it finished. NOW I like it a lot! And I’m enthusiastic about starting on those other bobbins for the rest of the sweater quantity of yarn.
This photo shows you exactly where I am with my 4 ply 200g spinning project. Not as far as I’d hoped, but not bad considering all the things going on around here. The top 2 bobbins are done (50g each). The lower bobbin is almost done and the fiber on the left has to be spun. And then ply them together. The plying will be quick and easy. I love plying.
I’m very happy with the consistency of the singles I’m spinning. This is Corriedale fiber that I bought from World of Wool (in the UK). It’s lovely to spin. I find I can spin it very fine or thicker with ease. I highly recommend this fiber for beginners and advanced spinners alike, plus it comes in a huge range of colors.
Speaking of consistency, there seems to be a serious lack of consistency in my life! Change is the only constant, which is something my husband is not always happy about. He longs for more consistency, less change. I seem to attract change like a magnet.
One change is that we are now the proud parents of 2 great big 9 month old Ragdoll cats. Their previous owner couldn’t keep them and we jumped at the chance to bring them home. They are the biggest cats I’ve ever owned, and the fluffiest. It’s taken a little adjustment on all our parts but Jake and Frank are settling in well.
Jake & Frank
The biggest news is that I have a new job. I’m pretty excited about it. I didn’t realize how excited I would be about working again. As my husband said, “you aren’t the retiring kind”. I guess he’s right. I missed having extra money for fun things. I missed using my brain to work out problems. I missed colleagues (ok, only the good ones 😉 ). And then this job fell into my lap and I’ve grabbed it up. It’s only 3 days a week so I still have time for fun things too, like my craft projects and accordion playing. But, it’s a change and requires finding a new routine. I’m suddenly busy. I’m suddenly having to plan my days. The consistency of our household is going through a period of inconsistency and change until we find a new rhythm and a new consistency.
I will still keep up this once a week posting, and I hope to still have enough interesting things to show you. I still have big plans for Experimental Spinning. I might expand the blog topics to include not only what I’m working on, but places that I visit that are craft/design related. Writing this blog will be a consistent thing in an ever changing world. 🙂
The Olympics have started and so has my Ravellenic Games spinning project.
There is a group on Ravelry that organizes the Ravellenic Games (which used to be called Ravolympics until the Olympic Committee threatened Ravelry with a lawsuit and shutdown if they didn’t change the name. Which pisses me off to this day.) to coincide with the games. There are “events” for types of knitting/crochet projects, and spinning. You pick your own goal and work towards it from the Opening Ceremonies to the Closing Ceremonies.
For my Ravellenic Games project I chose to spin 4 ply yarn, matching the 4 ply swatch I made in Experimental Spinning 1. I really thought that I could spin 540g of lace weight singles and then ply it all in 3 weeks. I was silly.
Opening Ceremonies spinning with the Dutch team.
I started spinning during the Opening Ceremonies and after Day 1 realized that there was no way I was going to get all that done. So I’ve revised my plan. I’m now going to spin 50g of each color and ply them together and then see what day it is. It might be Day 21! We’ll see.
This first color took me 4 days to spin. Here’s the finished 50g bobbin.
pinky finger size comparison
I’m spinning this project on an Electric Eel Wheel 6.0, which I really love. I can set it in front of the TV and spin away.
I’ve also been working on my cardigan. Here’s a photo of the body (mainly the back). I’m knitting the body in one piece, flat, up to the armholes and then I’ll split and knit the fronts and back separately.
The yarn is actually more brown than this, but you know, photos in winter light….
Part of the slowness of the spinning and knitting is that I don’t have good light at night. I would normally knit while watching tv but my husband complains that my lights disrupt his tv viewing with a big blob of light reflected in the tv.
I’ll have to see if my NEW JOB seriously impacts my craft time. I’m starting a new job next week but it is just 3 days a week so I still have plenty of time for spinning and knitting and writing here. I’m pretty excited about working again and it really seems like the perfect situation.
Next week I’ll have another finished bobbin to show – maybe 2! Are you watching the Olympics. I’m watching every day. I love the Olympics.
In the first part of ES2 I explored blending opposite, complementary, colors by plying them together. In this additional post I’ll take that one step further and blend those same colors on a drum carder, spin the fiber and knit swatches.
Subject – Blending complementary colors on a drum carder
Hypothesis – Taking the same colors that were used in ES2 and blending them on a drum carder will result in colors that match the Photoshop color blends created from photos of the plied swatches. i.e.
red + greenblue + orangeyellow + purple
Methods – I used the same fiber from the ES2, 50% color1 + 50% color2, and put them through the drum carder. I used 15g of each color for each batt. Every time I ran the fiber through the carder I took a photo of the carder and of the batt after taking it off the carder. For each color combination I ran the fiber through the carder 6 times. The difference between the 5th and 6th time was pretty minimal, but I was aiming for a “solid” color so 6 times seemed the most thorough test. That gives me 12 photos for each color combo, which is more than I want to put up here on the blog, so I’ll just use one color combo as an example. In addition, I made a sample using all colors together to see what that would look like too. Therefore, there are 4 samples in total.
For the photos off the drum carder I’m going to show the most striking example – yellow + purple.
After I created the batts I spun singles from half of the batt. I then chain plied the singles, soaked and hung them to dry. I knit swatches from yarn; 4 swatches in total.
When I finished the swatches I took photos (doing my best in this winter storm weather to get good light!) and then used Photoshop to blend the colors there to see what those color blocks would look like compared to the blends from ES2.
Testing – Here are the yellow+purple drum carder blend photos:
first pass carder
first pass batt
second pass carder
second pass batt
third pass carder
Oops! No photo.
fourth pass carder
fourth pass batt
fifth pass carder
fifth pass batt
sixth pass carder
sixth pass batt
Here are the finished batts next to their plied swatches from ES2. You can already see how much impact blending the fiber has on the resulting color that your eye sees.
I think that the last photo above, with all 4 batts and swatches together, is the best color representation of the photos. I am not a professional photographer and all I have is winter light and a few floor lights to work with. But this one is pretty darned close to reality.
Here is a photo of the finished yarn, balled up and ready for sample knitting. Again, this looks to me, on my computer, pretty true color.
Here are photos of the finished swatches, next to their matching plied swatches from ES2.
yellow + purpleblue + orangered + greenall colors
I then took those photos to Photoshop, cropped just to the knit swatches of the blended fiber, and blended the colors into one. Here are the results of that, compared with the same method used on the plied swatches in ES2.
yellow + purple carded
yellow + purple plied
blue + orange carded
blue + orange plied
red + green carded
red + green plied
all colors carded
all colors plied
Results – First, I’d like to say that I was most surprised by the purple and yellow combination. Carding those colors together created a green that was nearly impossible to know which colors were responsible for it! Comparing the 2 swatches side by side shows what a striking difference thoroughly blending fibers together can make. Your eye is completely tricked into not seeing any yellow or purple at all when the “pixels” or pieces of color are so small. Maybe if we had eyesight like an eagle the blended swatch would look like a smaller version of the plied swatch. I don’t know. But human eyes are not up to the task of teasing out individual color once they are so completely combined.
The red and green blended swatch came out darker than I imagined, but when I think about it, it makes sense because both of those colors have such dark values.
The blue and orange carded swatch looks very purple, which also makes sense considering how much a strong orange is composed of a lot of red.
The swatch of all the colors combined is really interesting. Does it remind you of anything in particular? A field of flowers from a distance? Ground sausage? The planet Mars? I think the yarn is really lovely, but my husband doesn’t like it at all. I think it’s a love or hate or too weird situation with that one. What do you think?
The results of comparing the Photoshop blurred images is not really conclusive to me. I think I need to spend more time to understand the algorithm used or find another way to blur the images to “see” the colors really combined. Actually, if you look at the Photoshop blurs of the carded swatches compared to their actual swatches, the colors are very close! I think probably the more “blurred” the image is in the first place (i.e. the carded swatches) the closer the Photoshop “blur” can represent it. When the image has such big color blocks to start with (i.e. the plied swatches), Photoshop cannot really represent it as a good average. Maybe I’ll investigate that further.
Summary – This has been a very enlightening and interesting set of experiments in this edition of Experimental Spinning. I have learned that
Blending complementary colors can give you very different results depending on HOW they are blended (plied together vs. carded 6 passes)
Combining complementary colors does NOT necessarily create brown colors. Even combining all primary colors and their complements doesn’t necessarily create brown. Brown is more complex than that!
Fooling your eyes into thinking you see a certain color is not hard to do. This opens up a whole can of worms – or roads to explore – in regards to color blending.
Blending colors on a drum carder is something I want to take to the next level of precision! Stay tuned for more on this topic!
After the weekend’s glove failure, I’m happy to show you my new mittens. They’ve been finished for a week now but I was waiting for the sun to come out to take photos. No sign of the sun and I can’t wait any longer! I wore them yesterday on a walk and had toasty hands the whole time. Looking down at these pretty mittens made me smile in spite of the grey weather.
I’ve already talked about the yarn and pattern before, and you can see more info on Ravelry, so I won’t make a long post out of this. Just a couple more photos….
Coming up next week…. Experimental Spinning 2a. I’ve been busy blending colors on my drum carder, spinning samples and now I’m ready to knit swatches. Pretty interesting results IMHO.
I’ve also picked up my cabled cardigan again. I’m working on the body. It’s slow going with so many stitches and cables, but I’m definitely enjoying it.
In less than 2 weeks starts the Winter Olympics and Ravellenic Games! More about that next week. I’m going to be doing a lot of spinning and posting about my progress EVERY SINGLE DAY. Get ready!
Yesterday I quit. I gave up. I frogged this glove in process.
It wasn’t just that my needles fell apart. They fell apart because they are old and well used, but also because this stitch pattern was just too much for them, and too much for my hands. It was not fun. I was not enjoying it. (Here’s the pattern.)
I had persevered and finished the first one….
The fit wasn’t great, but I thought the second one would be better. I’d make it better. And then I got to the hand section and remembered that I could only knit a few rows every few hours because it caused my hands to cramp up. Ugh. The final straw was when DB, who was the recipient of the gloves, said, ”STOP and knit something else.” You don’t have to tell me twice.
I frogged (unraveled) the one in process but I haven’t yet unraveled the completed one. I might not bother. I think there’s still enough yarn to make gloves using a different pattern. However, I’m not going to start again until the time changes and there is more daylight and actual sunshine in the day. I need more light, and I need a break.
I’ve returned to my cabled sweater and am SO HAPPY to be knitting with US5 / 4.75mm needles and worsted weight yarn again. I’m working on Experimental Spinning 2a. Plenty of fun things to work on! Be the boss of your knitting!